
How to Crimp Your Hair – Crimping Hair Style
Remember when big, textured hair was all the rage? We’ve spent a few years embracing the sleek, smooth ‘do, and it’s about time we bring back some of the frizz, preferably the crimped kind.
Big hair technically became the coveted style decades ago, but the crimper made its first debut in the 80s and 90s. Searching the archives of crimper heaven brings back fond memories of prom hairdos and hilarious yearbook photos. And stretching well into the 2000s, these glorious sawtooth tendrils were seen on all of our favorite celebrities and pop stars, appearing on the likes of Britney Spears, Melissa Joan Hart, and Christina Aguilera. Even more recently, Haley Williams of Paramore whipped out her crimper for her 2011 music video, Monster.
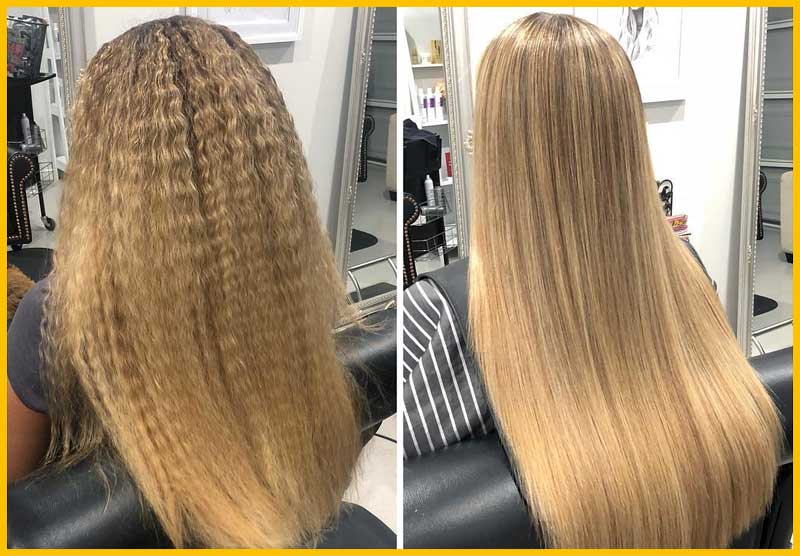
Using a crimper to add unique texture to your hair is a great way to achieve an edgier, longer-lasting style. Oftentimes crimped hair will retain its shape for days without falling flat, and can be molded into a kind of style from casual to editorial. Here’s how to create your own version of the Fuzz Box classic crimped ‘does!
Step 1 – How to crimp hair with a crimper

Crimping hair tool: First thing’s first, get yourself a reliable crimper. Because of the drop in popularity, crimpers aren’t as easy to track down as other heat styling tools, so your best bet is to shop online. The crimper I used for this tutorial was my trusty Revlon Perfect Heat Essentials Crimper, the last of its kind on the retail shelf, but luckily available on Amazon along with classics like Gold ‘N Hot or the Totally Bent Chrome Crimper from Bed Head. These crimpers are reasonably priced and have great reviews, plus they come in a variety of sizes! If you can, try to find a crimper that has adjustable heat settings so that you can choose either a higher heat setting for thicker, coarser hair or a lower heat setting for thinner, finer hair. Make certain to use a heat protectant spray before crimping in order to keep your hair safe from heat damage. Crimping, like any heat styling, puts a lot of strain on your hair and can cause damage if you’re not careful. I recommend spraying your hair with products like Firewall from AG Hair Cosmetics or Morrocanoil Heat Styling Protection before crimping.
Step 2 – Crimping Basics
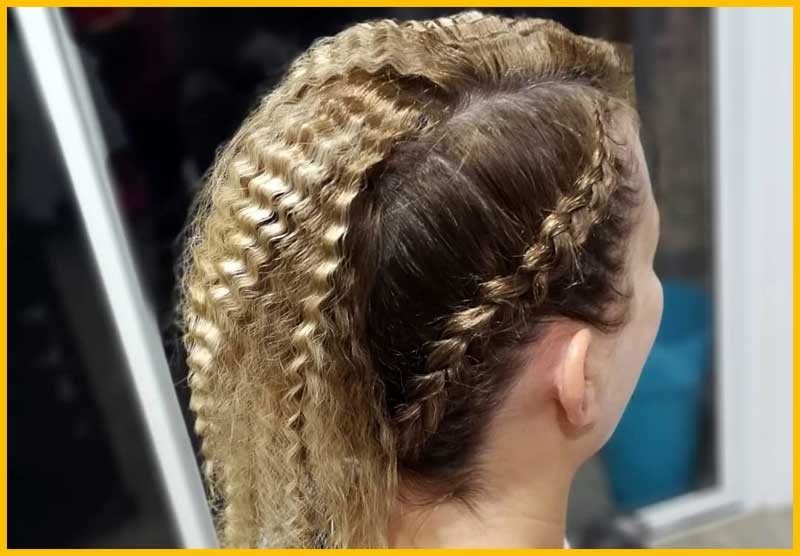
Depending on whether or not you’re wanting to crimp the entirety of your hair or just wanting to add crimped pieces into the mix for texture, start by separating a small to medium section of hair. To crimp, start at the base of your hair and clamp down to create your first indentation. Hold the crimper on your hair for at least three seconds, then move the crimper down the selection of hair to make another indentation to match the first. Continue crimping until the entire piece of hair is uniformly crimped, base to ends.
Step 3 – How to crimp short hair
If you want to crimp all of your hair, start with the outer layers and work your way into the shortest, most hard-to-reach pieces. When crimping the top sections of your hair, clip the finished pieces away from the selection you’re working on in order to access the bottom portions. Crimping your hair will make your hair texture a little less cooperative, so make sure you’re keeping your pieces separated until you’re ready to blend them all together. Feel free to mess up your hair a little bit or even backcomb for more volume! Finish off your crimped style with a medium-hold hairspray and any accessories you may want to use to accentuate your gorgeous mane.
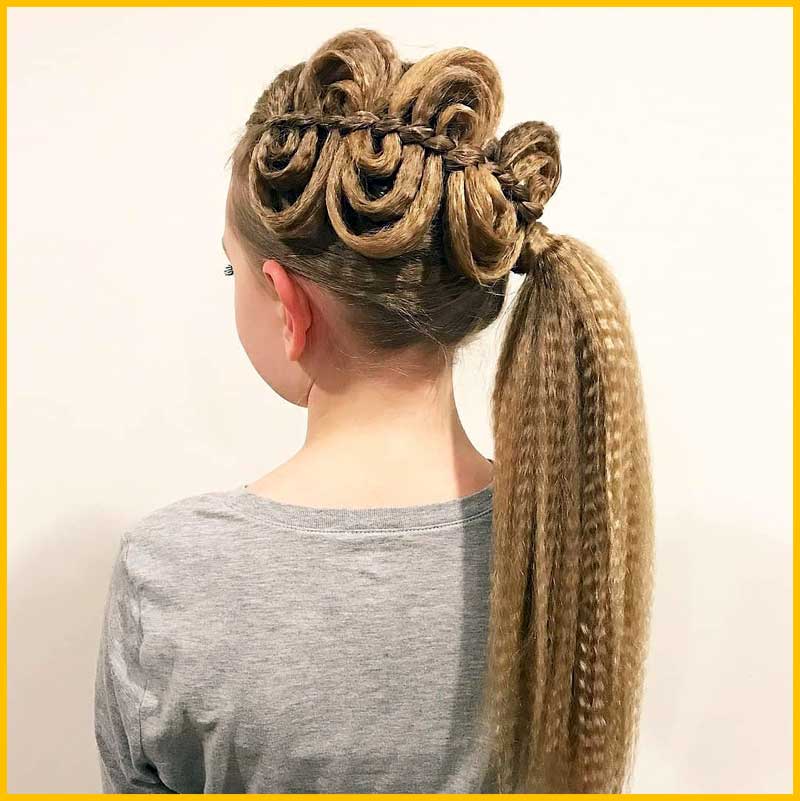
Just want to add in crimped pieces for texture? Separate a few small to medium-sized sections of hair and crimp them from the base to the ends. Use these crimped pieces to accentuate braids or other unique styles, or just to add something extra to your everyday ‘do.
- About the Author
- Latest Posts

I’m Iskra Banović, editor of Blufashion and the voice behind its fashion, beauty, and lifestyle stories. Fashion, beauty, and lifestyle are my playground, but I’m just as likely to share the messy side of it all, like the time I tested a “must-have” skincare gadget and ended up with glitter stuck in my hair. I love turning trends and everyday finds into something useful (and fun) for real people.


